
Supplies
-black shirt (I got mine for $3 at Michaels)
-card stock
-scissors
-double-sided tape
-cardboard (I used a cereal box)
-spray bottle
-bleach
-bucket with water and detergent
Making The Design
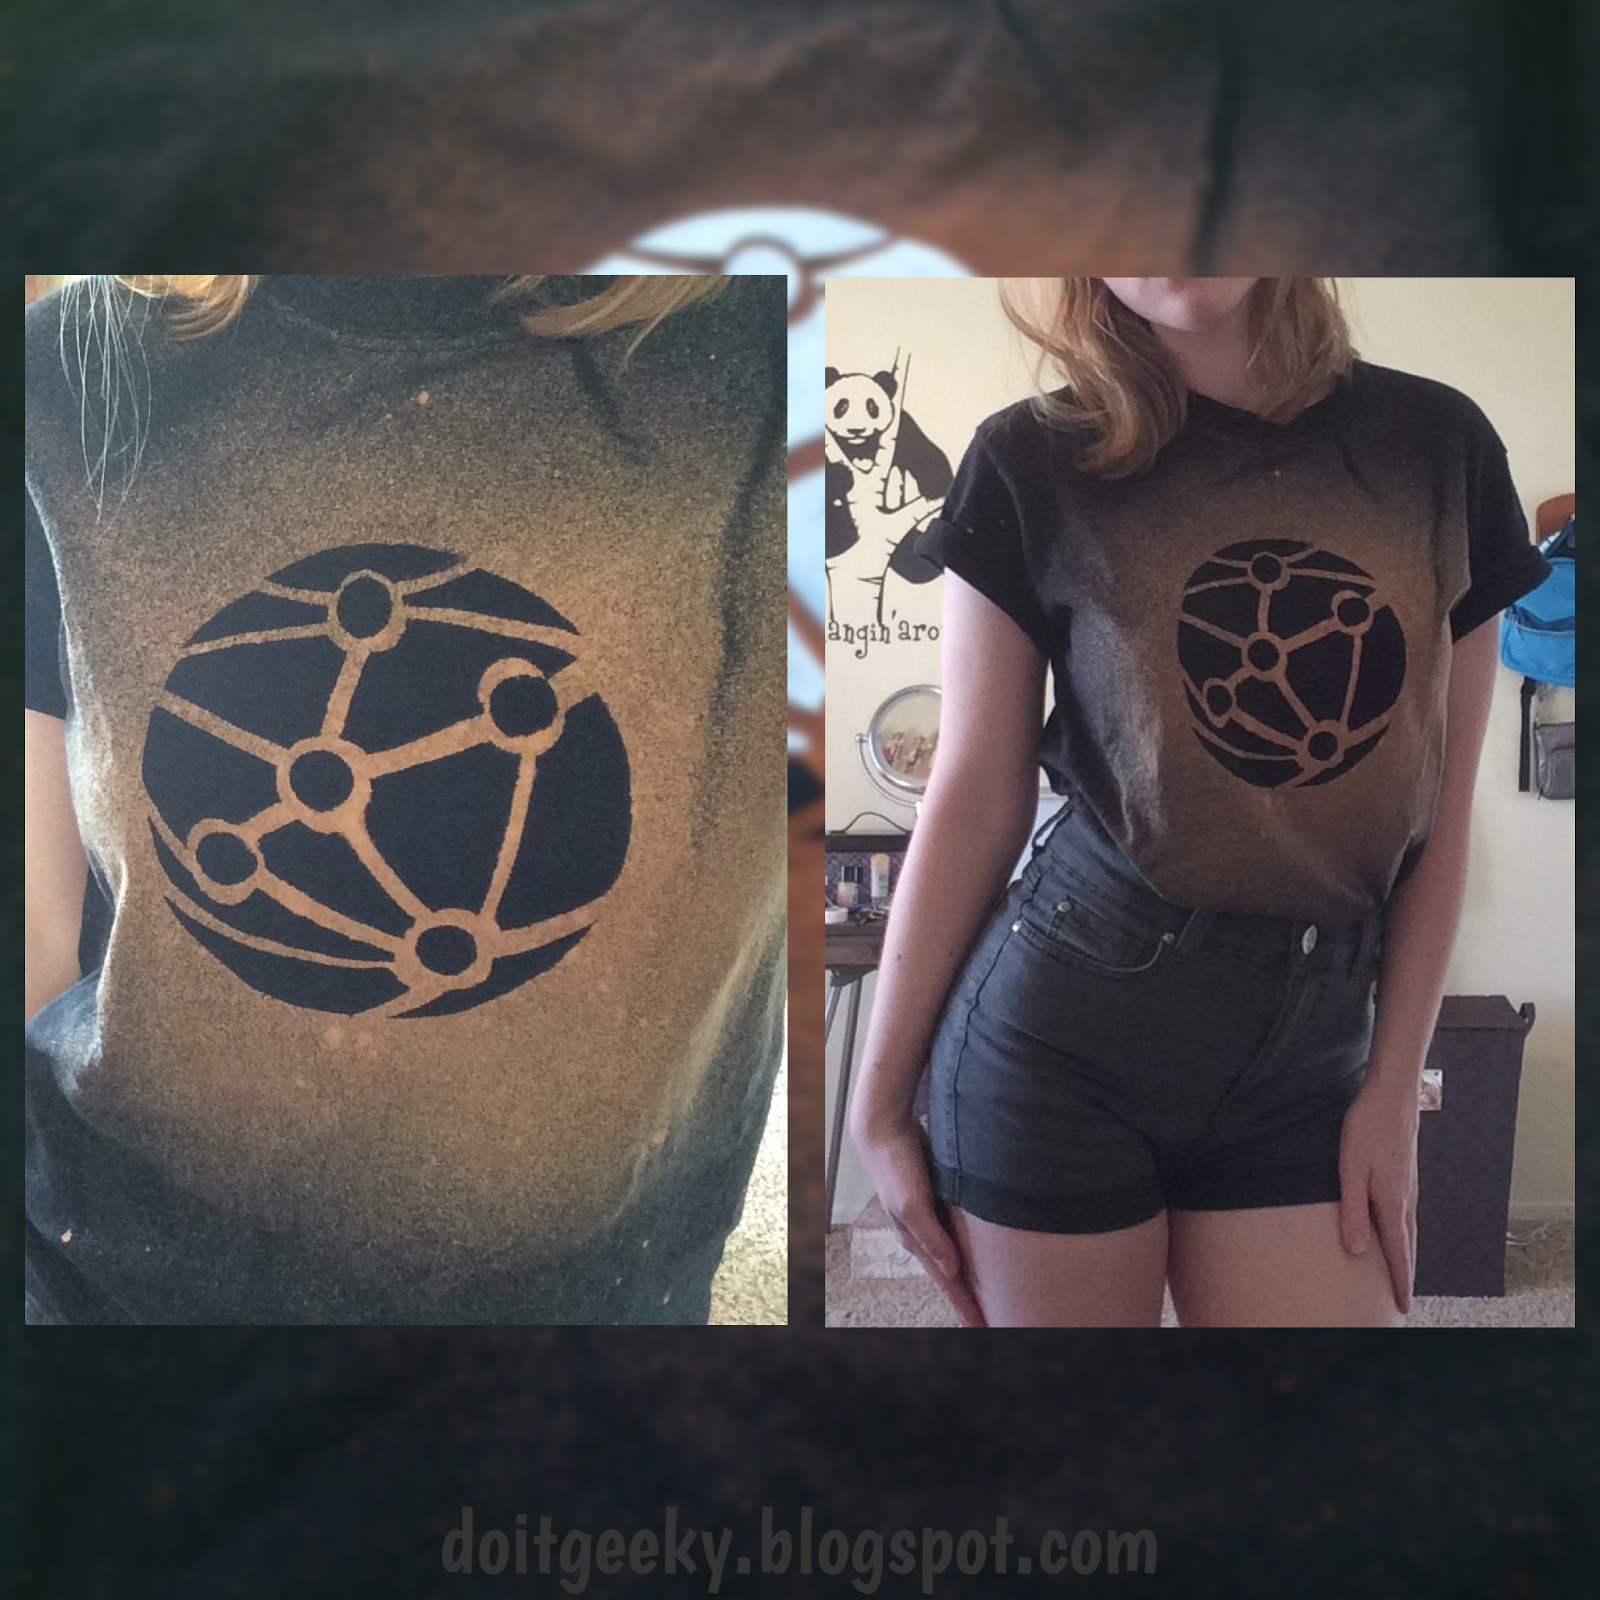
Start by finding a reference picture of the map and draw out the design on card stock. I used a circular lid for the whole shape and the bottom of a highlighter for the small circles inside. It is easier to draw out the circles first then connect them with the lines.

Then cut out all the shapes within the design. Using double-sided tape, tape the pieces onto the shirt making sure to leave room in between. I found it easiest to put the tape on the pieces first and then cut the excess tape off. Any tape that is showing will show in the end design, so make sure to cut close to the paper.


Bleaching The Shirt
*note: do this outside or somewhere that it is okay to get bleach on
Pour some bleach in spray a spray bottle (I used less than 1/2 a cup) and have a bucket of water with detergent in it ready so that the shirt can be cleaned immediately after spraying it.
Put a piece of cardboard under the font of the shirt so that the design does not seep through onto the back.
Begin by spraying all over and around the stencil. To give the shirt an overall galaxy star effect, spray over the shirt with the nozzle facing parallel to the work space. The bleach will spray above the shirt and and the fall out will show up as small specks. Do this method sparingly to the front and back of the shirt.

Immediately wash and rinse for a colored design like mine, or let the bleach soak in for a white result. Hang it to dry.
No comments:
Post a Comment